meta data for this page
Configuration Process Overview and Instructions
Throughout the entirety of the initial configuration process and its related pages and processes, you the administrator are able to configure essential elements about your system. These essential elements include such fields as the domain name of your website, the system email address, the default messages received by subscribers when they (un)subscribe or update their preferences, as well as other default configuration settings, including the default header and footer on the subscribe pages, etc. The configuration process and its associated steps are one of the preliminary processes you must complete before you can begin sending campaigns and effectively use the phpList system.

Initialise Database Process
Initialising the database is the first step in the Configuration Process. You will see instructions asking you to initialise the database on the Dashboard. The Dashboard, a location where you normally initiate campaigns, will not be initialised until the initialise database process is complete.

Directions/Steps
- Select Initialise Database to begin the configuration process from the unconfigured Dashboard. Note that the “configuration page” will not show until the database has been initialised, all tables have been created, and the administrator (you) logs-in for the first time.
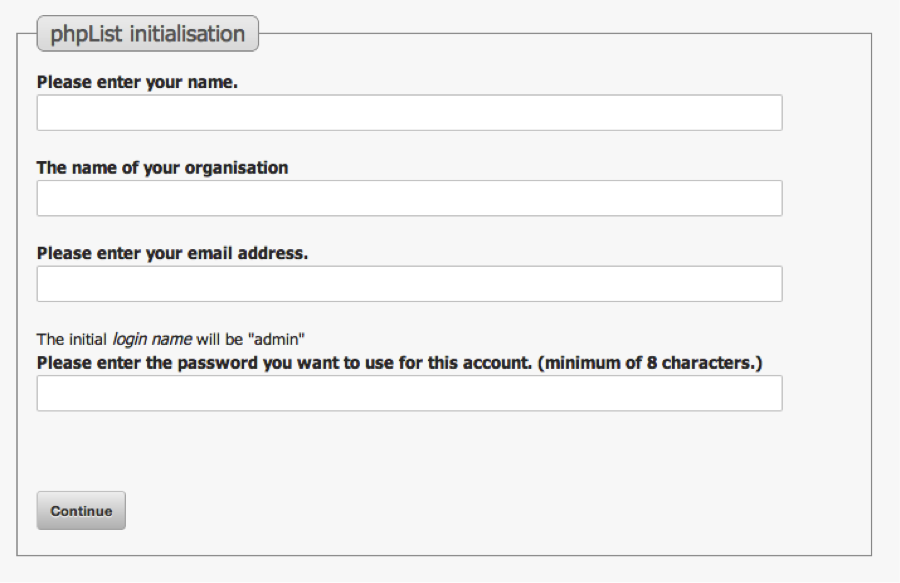
- Complete the required phpList initialisation fields, and select Continue.
- The system will create tables as part of the database initialization process. If the tables are created successfully, a message indicating “Success” will appear below the created tables. Continue by selecting phpList setup.
- A first time Administrator will be led to a screen that requires a default login and password.
- The initial login name: admin
- Use the password you created on the PHP initialisation screen displayed in the screenshot above
- Upon initial login, the configuration screen will appear. At this point in the Configuration Process, you have successfully initialised the Database.


Reinitialise the database later
If at a later date you need to reinitialize the database (wiping all data and recreating the empty tables), use one of the following methods.
Automatically reinitialise
phpList can automatically reinitialise the database for you via the web interface:
- Log in as an administrator
- On the main menu visit System → Initialise the database
- Scroll to the bottom of the page (past any errors that may be displayed)
- Click Force initialisation
- Follow the on-screen instructions.
Manually reinitialise
- Delete the existing database (e.g.
drop database phplist) - Create a database with the same name (e.g.
create database phplist) - Ensure you logged out with sessions destroyed by visiting
/lists/admin/?page=logout(e.g.https://mysite.com/lists/admin/?page=logout`) - Visit the initialisation page at
/lists/admin/?page=initialise&firstinstall=1(e.g.https://mysite.com/lists/admin/?page=initialise&firstinstall=1) - Follow the on-screen instructions
Change Admin Password
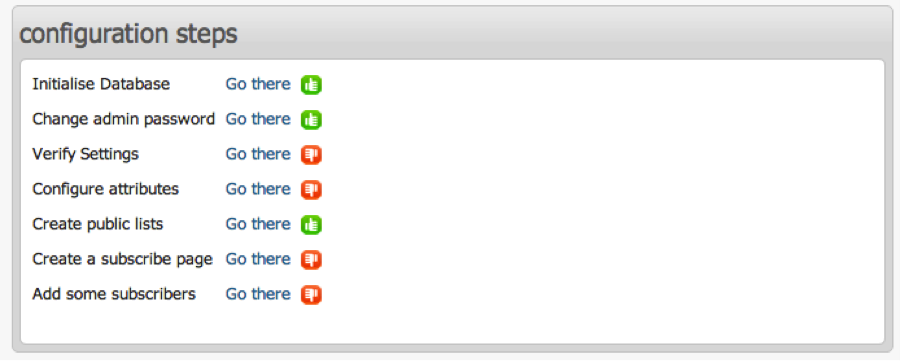
Because the administrator password was created during the phpList initialization process, the system will bypass this step and place the ![]() icon next to the ‘Change Admin Password’ step. The
icon next to the ‘Change Admin Password’ step. The ![]() icon indicates the steps that have been completed, while the
icon indicates the steps that have been completed, while the ![]() icon indicates the step(s) that still need to be completed. Items marked with a
icon indicates the step(s) that still need to be completed. Items marked with a ![]() can be edited at a later time, but they do not require your attention now, as they have been completed. The next step in the configuration process is “Verify Settings.”
can be edited at a later time, but they do not require your attention now, as they have been completed. The next step in the configuration process is “Verify Settings.”
Verify Settings
Choose Verify Settings within the “configuration page” to proceed with initialisation and to configure the default settings for your system. These settings include the domain name and system email address, default subscribe page system messages, default header/footer, etc. While this information is created during the Configuration process, it can be modified at any time.
Directions/Steps
- Select Go there next to the first uncompleted step, “Verify Settings.” Note: Although this is not the first step in the process, it is the first uncompleted step in the guide since “Change Administrator Password” has already been completed.
- All values on the “Settings” page can be edited. The setting categories include general, security, reporting, campaign, transactional, subscription-UI, segmentation, and subscription settings.
- Select the
 icon next to the setting category that you desire to change.
- After modifying a setting, select Save Changes to save your modifications.
- To cancel changes that you have made, either return to the setting and manually change it back to its original setting, or select Reset to Default in the top right corner of the page. Note that this action will reset all other settings to default.
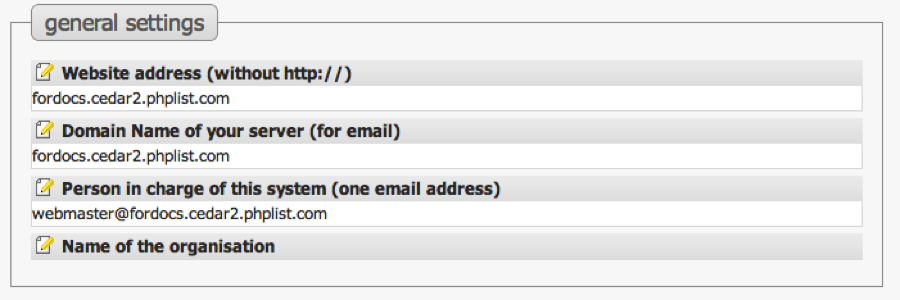
- Some of the default 'General Settings' information within the settings page include:
- Web Address - Enter your site's web address without the http: part, e.g. (www).domain.com or subdomain.domain.com. phpList will use this setting to generate URLs for internal referrals.
- Domain Name - Enter the domain name of your server for use in email messages. (For instance, domain.com.)
- The person in charge of the system (One email address) - This field usually refers to an email address of a SuperAdmin or Webmaster. Ultimately, this email will receive Notifications pertaining to double opt-ins (subscriptions), single opt-outs (unsubscriptions), changes in subscriber preferences, etc. Addresses defined in the ‘People to CC in system emails’ setting field will also receive notifications. This can be changed in the ‘Does the Admin get copies of Subscribe, Update, and Unsubscribe messages?’ field.
- Some of the default 'Security Settings' information within the settings page includes:
- Check for Updates – Enter the number of days phpList should wait before checking for a new release. If an updated version is found, you will be notified when you login to the administrator’s module (“backend”). Note: You (the Admin) will have to manually download and install any new phpList version.
- Some of the default 'Reporting Settings' within the page include:
- People to CC in System Emails - Enter the email address of people - usually other admins - that should receive copies of email notifications of subscriptions, subscription confirmations, changes in subscriber preferences, etc. sent to the “person in charge of the system”.
- Who gets the Reports? - Enter the email addresses that should receive the reports phpList will generate when processing the message queue, bounces, etc.
- Does the Admin get copies of Subscribe, Update, and Unsubscribe messages? Select Yes or No for the dropdown.
- Some of the default 'Campaign Settings' include:
- Default From Email in a Campaign – The ‘From email’ that will be visible to subscribers when a message is generated from the system.
- Default for ‘email address to alert when sending starts’ – The email address, usually an administrator, that is alerted when a campaign begins to be processed.
- Default for ‘email address to alert when sending finishes’ – the email address, usually an administrator, that is notified when a campaign finishes.
- Always add Google Tracking Code to campaigns – Select Yes or No from the dropdown. Adding Google tracking code allows the administrator to embed tracking code in the emails, and ultimately, it is a way of providing more information about the success of a campaign to the administrator.
- The “settings page” also has default 'transactional settings.' Use caution with these settings, as you have the ability to modify any of the fields to control how a subscriber views your campaigns or emails messages. Some of the fields that can be changed include the message (body content) or the subject (title) of the email. It is important to be consistent with your messaging.
- From Email Address for System Messages - Define the email address that is displayed as the sender of system emails. The name displayed in the ‘From’ field should be configured in the next setting. System messages refer to general high-level messages including those that are sent when a subscriber subscribes, unsubscribes, or confirms their subscription. Note: System messages are different from campaign messages.
- From Name for System Messages - Enter the name of the person, company or organization that will appear in the ‘From field of system messages.’ If this field is left empty, only the email address defined in “From email address for system messages” will be displayed in the ‘From’ field.
- Reply to Email Address for System Messages - Enter the Reply-to email address that should be used when recipients reply to system messages.
- Subject of the message subscribers receive when they sign up – The current default message is set to “Request for confirmation”. You can modify this message within the “Settings Page”.
- Message content subscribers receive when they unsubscribe – Similar to above, there is a default message that can be also changed.
- Subject of the messages subscribers receive when they unsubscribe – This is the title, which displays in the subject field of an email message, which subscribers’ will receive when they unsubscribe from your email messages.
- Subject of the messages subscribers receive after confirming their email address.
- Message subscribers receive after confirming their email address.
- Subject of the message subscribers receive when they have changed their details.
- Message content subscribers receive when they have changed their details.
- Most, if not all, of these fields are self-explanatory.
- Message Placeholders – Placeholders are content that can be added to the default code in the settings page. They are a special word enclosed in square brackets, that stands-in for data that is to be inserted later on in the HTML and/or text message. In phpList, placeholders hold the place for dynamic data and provide an effective way to personalize messages. Some useful placeholders include:
- [WEBSITE] - the address you type for your website
- [DOMAIN] - the text you type for your domain
- [SUBSCRIBEURL] - the location of the subscribe page
- [UNSUBSCRIBEURL] - the location of the unsubscribe page
- [PREFERENCESURL] - the location of the page where users can update their details
- [CONFIRMATIONURL] - the location of the page where users have to confirm their subscription
- After entering and saving the variety of settings outlined above, the “Verify Settings” process is complete.
- Return to the previous configuration page by selecting Continue configuration.


Configure Attributes
In the previous version of phpList, attribute functionality served as a way for phpList to function not only as a mailing system, but also as a real subscriber database. Instead of having only an email address identifying each subscriber as in an ordinary mailing list, you could customize attributes, adding such things as first name, last name, an attribute listing countries in which the subscriber may reside, an attribute proposing a series of favourite meals, etc. By leveraging attributes correctly, you (The Administrator) could use the criteria to specifically target messages to a more precise subscriber. This functionality is no longer a core capability of the phpList. However, it is available as a Plug-In, and performs the same functionality as it did in the previous version. Currently, attributes serve to provide additional subscriber data, and lists are used for segmentation purposes.
Subscribers can have access to any number of attributes in any order. These preferences are selected by the admins in the subscribe pages. Attributes can be mandatory, or not. They can have default values, or not. Additionally, attributes are Global, meaning that any admin can access all attributes. Attributes are therefore unlike lists, which are admin-dependent.
Directions/Steps
- Continue to the next incomplete configuration setting, choosing Go There, next to “Configure attributes”
- You can either select and load attribute data from 'Predefined defaults' or add a new attribute. Predefined attributes/values include: Countries, States in the USA, Counties in the UK, etc. You can upload these automatically instead of adding other attributes manually.
- Select Load Data from ‘Predefined defaults’ to define an initial attribute. Attributes serve to provide additional subscriber data.
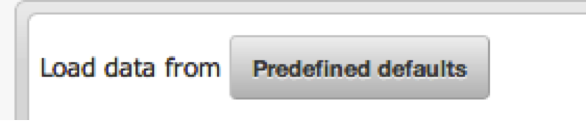
- The default predefined attributes include those in the following image.
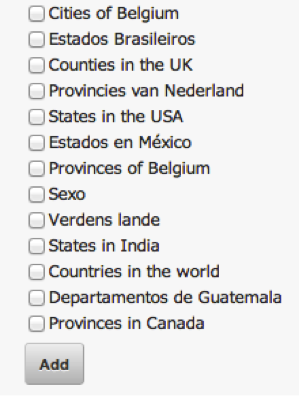
- Select Add to include a default predefined attribute as one of your initial attributes. After an attribute has been added, select Return to editing attributes.
- Attribute 1, or the predefined attribute that was just added, will appear on the following screen. From there, you can edit the name, type, default value, and order of listing.
- Existing Attributes display in the following manner:
- Click the edit type dropdown, to edit the ‘type’. To edit the value of Attribute 1, or US States, select Edit values.

- To erase an attribute value, select the Trash Can icon. Take note of the difference between attributes and attribute values.
- To add another attribute value, select Add new.
- From the edit value page, select Back to attributes to return to Attribute 1.
- Choose whether or not the attribute is required by placing a checkbox next to the ‘Is this attribute required?’ field. Required Attributes will be shown in red on the “Subscriber Page.”
- To merge attributes, select Merge. Merging attributes means that the values for users will stay the same, but that the actual attribute they belong to is merged into one. Click on the
 icon for more details about merging attributes. Merging attributes is a simple-sounding concept that can be very difficult in practice.
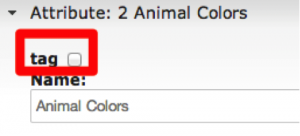
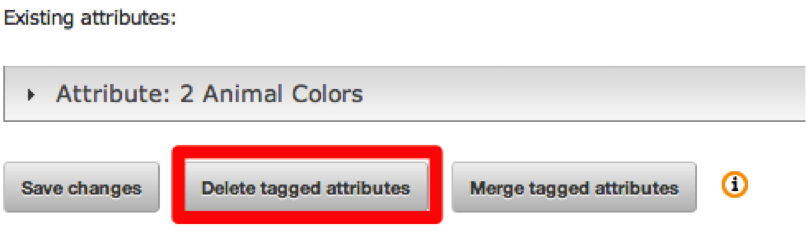
 - Delete attributes that have already been created by first marking an attribute as tagged, then select delete tagged attributes on the “Configure attributes page.” This is different from deleting individual attribute values mentioned above.
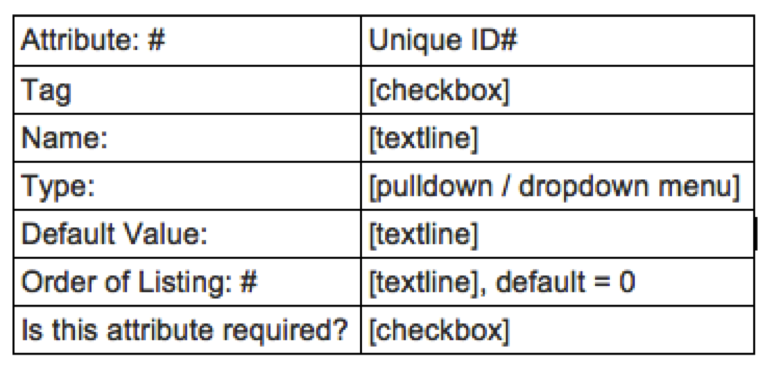
- To add a new attribute, fill out the corresponding fields in the ‘add a new attribute section.’ Attribute fields include:
- Attribute number – Each attribute will have a unique ID number.
- Tag – An attribute can be tagged to perform an operation.
- Name – Name of Attribute; it will appear on the subscribe page.
- Type – Dropdown Menu of attribute types. Types of attributes must be chosen with thought to the future, as they are very difficult to change down the road. See Attribute Values for more information regarding Type. The following types are included:
- Textline is a one-line text field in which the admin can type something freely. This is convenient for anything reasonably short (for example: phone numbers, first/last name, street name, etc.)
- Checkbox can be checked or left unchecked (default value). It is often used when you ask someone to agree to something (for example: 'do you agree to be contacted by phone? if so, please check this box.') Note: A checkbox attribute cannot be changed into a checkboxgroup attribute without creating potential problems. This type of attribute requires values.
- Checkboxgroup allows you to have several checkboxes. Several checkboxes can be checked or left unchecked. You can add checkboxes to the initial list as time progresses. This type is convenient if you want people to choose one or several options (for example: 'do you like: pasta/ meat/ seafood/ vegetables/ fruit?'. Someone can check 'pasta' and 'fruit'.) This type of attribute requires values.
- Radio pertains to a radio button, which can be selected from a list of other radio buttons. You can only select one radio button from the list. This is convenient if you want people to choose one element exclusive of all the others (for example: 'smoking / non-smoking'. Some can select either one or the other, but not both.) This type of attribute requires values.
- Select allows for a pull-down menu in which subscribers can select one value. The list of values listed can be modified as time goes along. This is convenient if you want people to select one element from a relatively long list of possibilities (for example: country of residence). This type of attribute requires values.
- Hidden fields are used to “save state” within HTML forms. They are not shown on the Web page, but the information is sent along with other form input fields. Usually, the hidden fields will contain configuration information for the server-side action script which handles the form data, e.g.: <input type=“hidden” name=“list[1]” value=“signup” />
- Textarea creates a bigger box in which people can write down something which is relatively long, as opposed to the textline option. This is convenient when you want people to express themselves in a way that is not possible with pre-defined lists.
- Date creates a field in which Day/Month/Year can be selected (for example: when do you plan to go on vacation? or when is your birthday?). By default, the drop down for year will display values ranging from three years before to 10 years after the current year. If you want to use a bigger range, you can set the start and end year by editing the DATE_START_YEAR and DATE_END_YEAR settings in your config.php file. Keep in mind that the drop-down list may become very large.
- Default value – A default value can be specified for an attribute.
- Order of listing – this will be the order the attribute is listed to the admins in the admin area. Since it is global, this will appear to all admins. A different order can be specified for the attribute on the subscribe page. You can specify the same order of listing for several attributes (for example: 28), in which case, those attributes will be sub-ordered by ID number (descending).
- Is this attribute required? – By selecting this checkbox, the attribute will be required and shown in red on the subscriber page.
- Attribute Values are types of attributes that require a value. Subscribers can select these values for each attribute, and the administrator can choose to add or remove values, as well as specify the order in which these values appear.
- Example: The Admin has created a 'Country' attribute with a dropdown/pull-down menu (in other words, a select type of attribute). Once the attribute 'Country' has been created, he/she can control values for Country by clicking on the link “Country” which appears in the Configuration options section on the main page of phpList. Then, they can add new value, delete all values or delete one value, as well as change the order in which the values are listed. Each attribute value will appear in the menu for ‘Country’.


Create Public Lists
Creating public lists is an additional step in the configuration process. Public Lists are another list type in addition to private lists. Public lists will appear on the “Subscribe Page.”
Directions/Steps
- Continue to the next incomplete configuration setting, “Create public lists,” by choosing Go There.
- A number of lists will show, and the administrator can use the dropdown to navigate between “Categorized Lists” and “Uncategorized Lists.” By default, the system will display all uncategorized lists.
- While lists organize subscribers, categories are used to organize lists into different groups. From a subscriber perspective, categories are not important, since they are never visible to the subscriber.

- The default list page, called the “Subscriber Lists” page, offers the Admin a variety of functions. Outside of an already created list, you can categorize lists or add a new list. If a List has already been created, you can edit the list, view list membership, add members, view bounces, change the list order, or render a list public or private. Note that this page has a drag and drop functionality. As an admin, you can reorder the lists as you see fit.
- To Categorize Lists, select Categorize lists.
- If no list categories have been previously defined, the system will ask you to set up categories. To define the categories, select Configure Categories.
- Create categories by entering their names into the allotted section, separating different categories by commas.
- Upon the creation of the different categories, the Admin will be directed back to the general settings page. The categories for lists will appear under “Segmentation Settings.”
- Return to the “Create Public Lists” page by either selecting Config in the title bar or navigating to the appropriate page listed in the Recently Visited portlet.

- Now that Categories have been created, you may categorize lists in a number of ways.
- First, you can select an individual list by selecting the lists name.

- After selecting the list, in this case, “dogs,” the Admin can edit the list and choose the appropriate category in the Choose Category dropdown option. After selecting an option, choose Save.
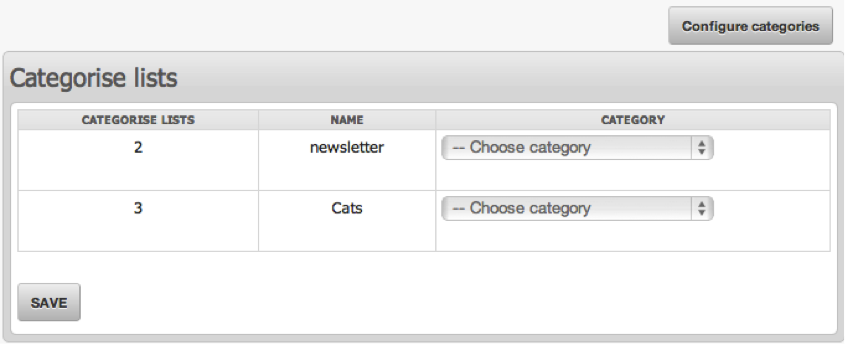
- The Admin may also select the Categorize Lists option on the “Subscriber lists” page, similar to how they proceeded when originally creating the Categories. Since the Admin has already created potential categories, they will be taken to a “Categorize Lists” page. Here, you have the option to assign Categories to the uncategorized lists, or Configure (Add/Remove) more categories.
- Add Lists
- To add a list from the subscriber lists page, select Add a List. This action brings you to the “Edit a List page,” allowing you to customize the list name, owner, category, description, whether or not it is public or private, and the list’s order. Once finished with the required fields, select Save to create the new list.
- You then have the opportunity to Add subscribers manually. By default, after adding a list via the subscriber list page, you will be able to import subscribers by the copy-and-paste method. From the add subscribers step, explained later, you can add subscribers via two other ways.
- After adding the desired emails, select Import Emails. The following page will display the results of this action, and allow you to send a campaign directly, or import more emails.
- Edit Lists – As mentioned above, you have numerous capabilities within already created lists. To edit a list, select the name of the list. Editing a list is very similar to the process of adding a new list, except that you are working from a previously created list.
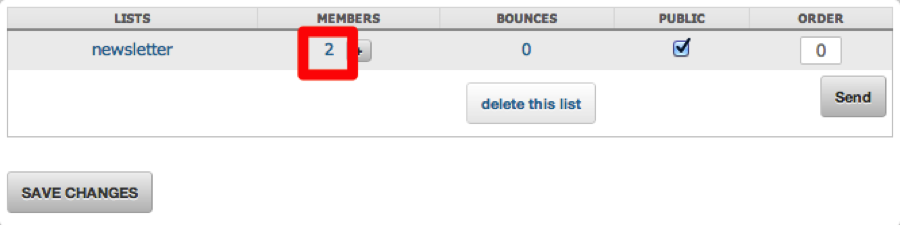
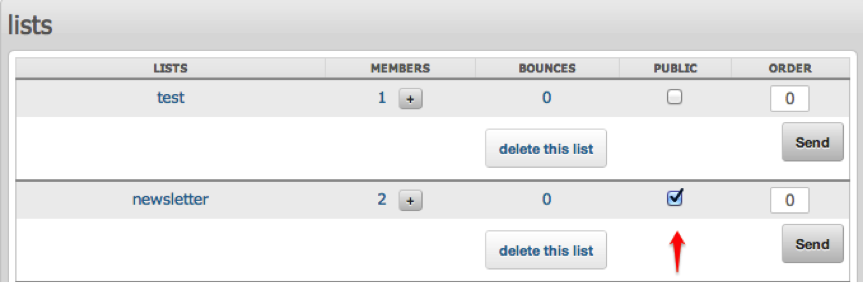
- View List Membership – To view the members of a current list, whether categorized or uncategorized, select the number of current members. In the example below, the number of current members within list newsletter is 2.
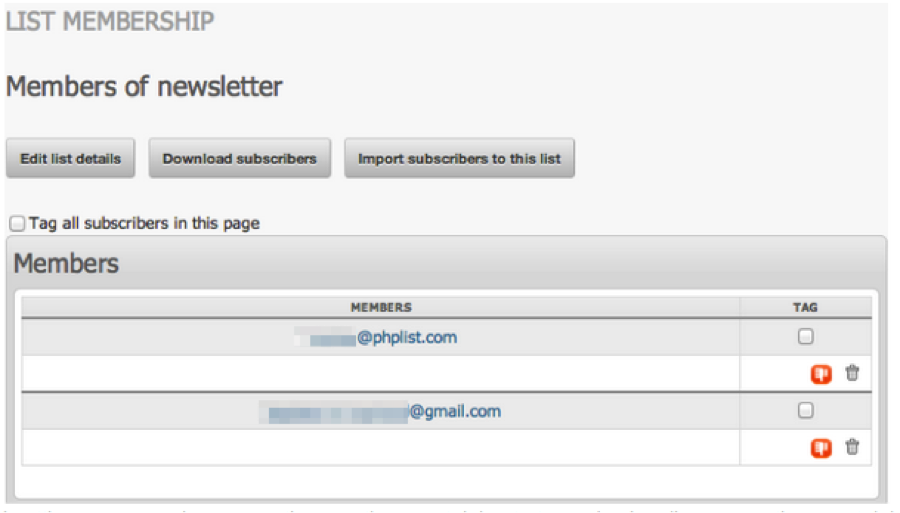
- After selecting the number of list members, you will arrive at the “List Membership” page with the ability to edit the list details, download subscribers, import new subscribers, tag subscribers, delete members, and change a variety of general settings that pertain to the entirety of the list.
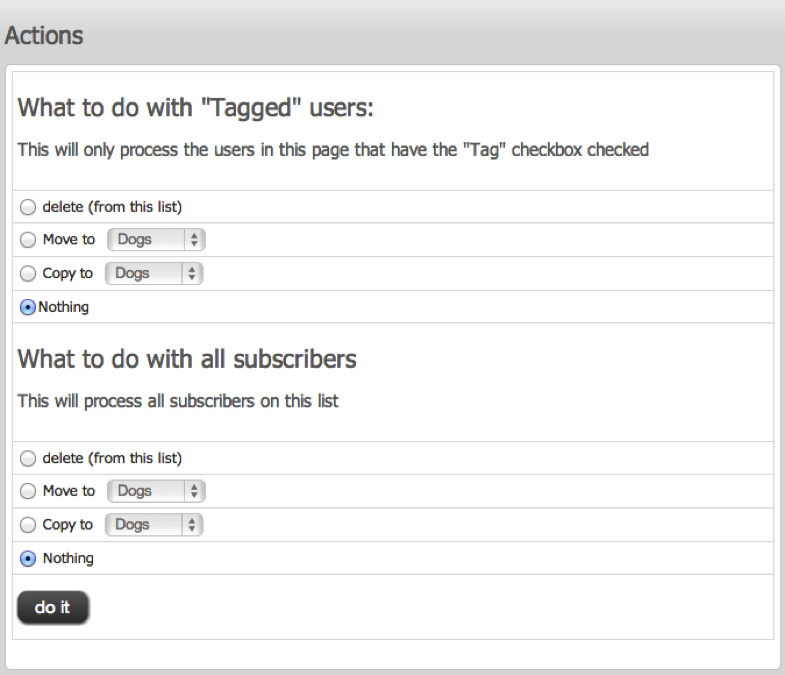
- The more general settings you can change are those actions pertaining to tagged subscribers, or actions pertaining to all subscribers.
- Actions for Tagged Subscribers - For example, if an admin tags 10 users from the Newsletters list, they would then be able to: (1) Delete all the tagged users from the current list, (2) Move the tagged users from the newsletters list to another list, (3) Copy the tagged users from newsletters to another list, or (4)Do nothing.
- Actions for All Subscribers – Administrators can perform the same actions to all subscribers as they did to tagged subscribers.
- Add Members – To directly add members within a list, select the [+] icon shown below.

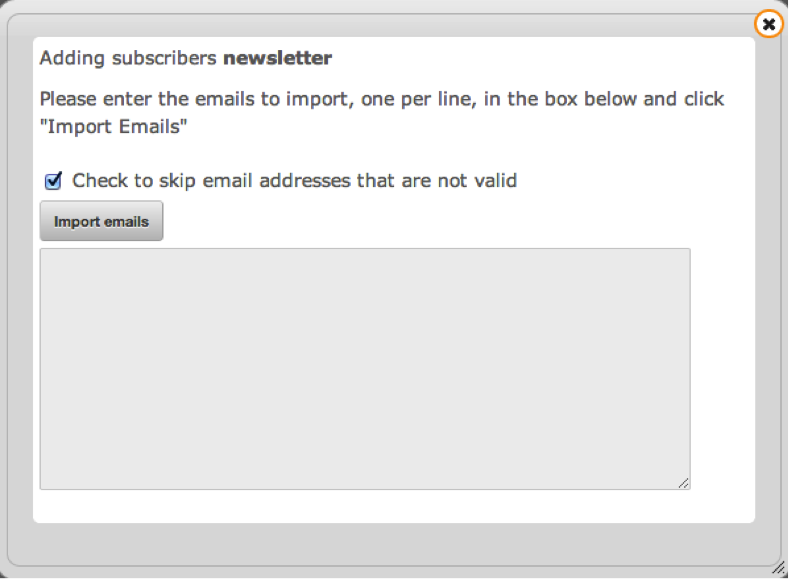
- This action allows the admin to manually import emails in a pop-up window, without navigating away from the subscriber list page.
- View Bounces Per List - A bounce is a campaign message that is returned because it could not be delivered for a number of reasons: The mailbox of the recipient might be full, the email address might no longer be valid or temporarily disabled, the email address might be misspelt, etc. A bounce is not the same as an out-of-office reply. To view bounces per list, click on the corresponding number under the title “Bounces.”

- Determine Order – Self-explanatory.
- Mark Public or Private – Choosing whether a list is public or private determines if the list will show on the subscribe page.
- If you render a list private, it will not show on the subscriber page (the page that a subscriber sees when they want to subscribe to a list.)
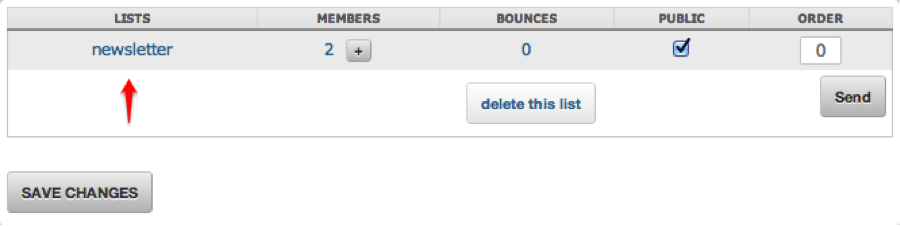
- If a list is private, you can choose who joins the list, but the subscriber cannot technically sign-up from a subscribe page. They can, however, unsubscribe. In the example below, the lists Monkeys and Newsletters are both marked as public.


Creating a subscriber page
In the previous version of phpList, the system required that an admin set up at least one “subscribe page.” While it is still recommended, it is no longer required. Now, if an administrator does not set up a “subscribe page,” a default “subscribe page” will be created featuring all attributes and all public lists.
The subscriber page is the public page through which Subscribers can subscribe to lists. Admins can ask subscribers to fill up other fields in addition to their email address. These extra fields are the attributes that have been created in the system. On a custom subscribe page, all, some, or none of the available attributes can be used. Several subscriber pages can be created, but one page will always be the default subscribe page. Likewise, for each Subscriber page the admin must select the list(s) they want subscribers to be able to subscribe to.
Directions/Steps
- Note: This step is not required to begin sending campaigns.
- Choose Go There to Continue to the next incomplete configuration setting, “Create a subscriber page.”
- Select Add a new one to create a new subscriber page.
- When editing a subscribe page, you as an admin are able to edit fields associated with General information, Transaction messages, Attributes to use, and Lists to offer. The important fields are as follows:
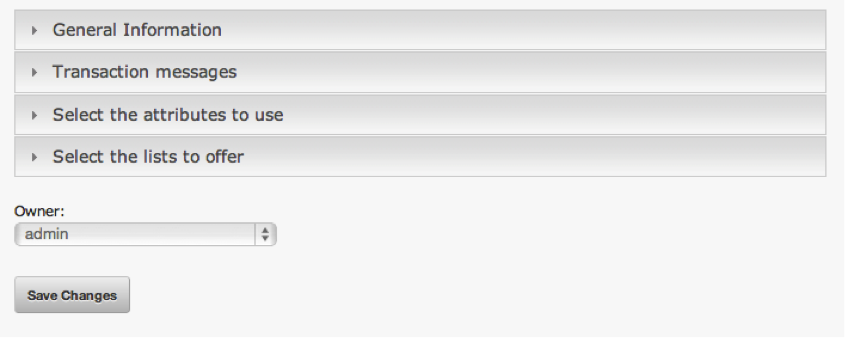
- General Information
- Title – A text field that when filled, will appear in the top of the page.
- Intro – A text field that will only display on the subscriber page, but not other pages like the confirmation page or update preferences page. This can contain HTML code.
- Header & Footer
- Thank You Page
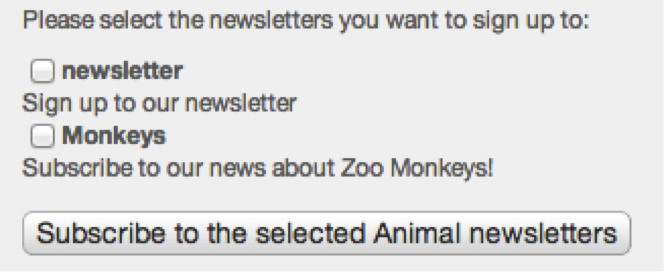
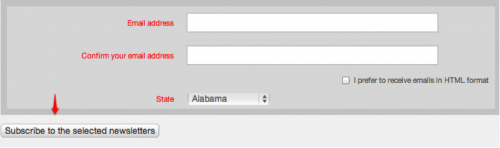
- Text for Button – A text field that can be changed by administrators, but by default, the submit button will display Subscribe to the selected newsletters.
- HTML Email (Message) Choice - The admin must select one of the radio button options below, and these options determine the extent to which subscribers are allowed to select the format in which they receive their messages.
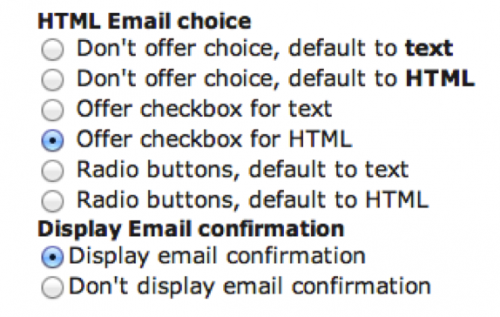
- Display Email Confirmation – A second email confirmation field beneath the email field that serves to reduce the risk of subscriber typos by requiring the subscriber to enter their email address twice.
- The message they receive when they subscribe – You maintain the ability to edit the title and subject of the first message a subscriber receives when they subscribe. The message should be clearly marked saying that the email message requires immediate action: confirmation of subscription.
- IMPORTANT: The admin must be sure to include a [CONFIRMATIONURL] placeholder somewhere in the message. This is the link that allows subscribers to confirm their subscription. If the subscribers cannot confirm their subscription, they will be considered as not confirmed by the system, and no messages will be sent to them. It is also a good idea to include another placeholder: [LISTS] which will include the lists names, reminding the subscriber of which they chose to subscribe.
- Message they receive when they confirm their subscription – The admin also can tweak the title and content of the second email message a subscriber receives, when they confirm their subscription.
- IMPORTANT: The admin must include the following placeholder in the message [UNSUBSCRIBEURL]. This is a link allowing the subscriber to unsubscribe from your system. It is also a good idea to include two other placeholders: [LISTS] which will include the lists the subscriber chose to subscribe to, and [PREFERENCESURL] which allows subscribers to return to their file to edit/update their information.
- Select the attributes to use.
- Selects the lists to offer.
- Within General Information, you can change a variety of key fields, including the title, the introductory message, and the language to use. Additionally, when editing the subscriber page, you can change the email format in which subscribers receive their emails.
- By selecting transaction messages, you can edit:
- The message a subscriber receives when they subscribe.
- The message a subscriber sees when they confirm their subscription.
- The message they receive when they unsubscribe.
- The ‘Select the attributes to use section’ allows the administrator to choose which attributes they want to use on their page, the order of their listing, and its default value. The same attribute can be used in several subscribe pages. An attribute does not have to be used in any subscribe page. In that case, it is a hidden attribute, and subscribers can’t see it.
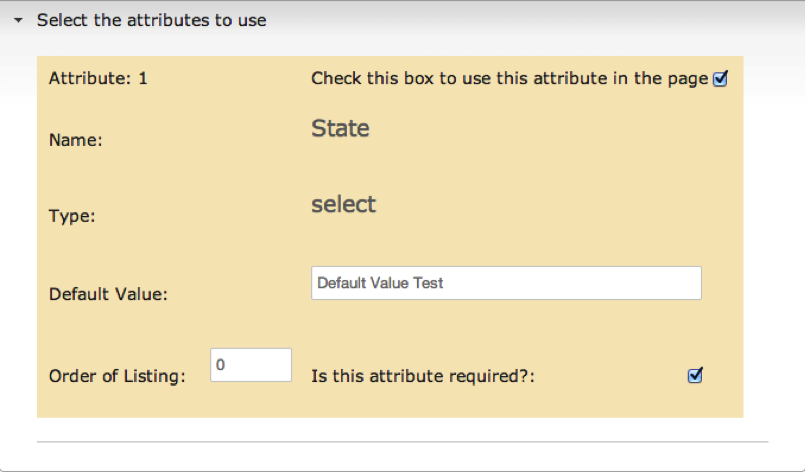
- Order of Listing – Corresponds to the order in which the attribute will appear in the subscribe page only.
- Is this Attribute Required? - Marks the attribute in red on the “subscribe page” and requires subscribers to fill in that attribute before confirming their subscription.
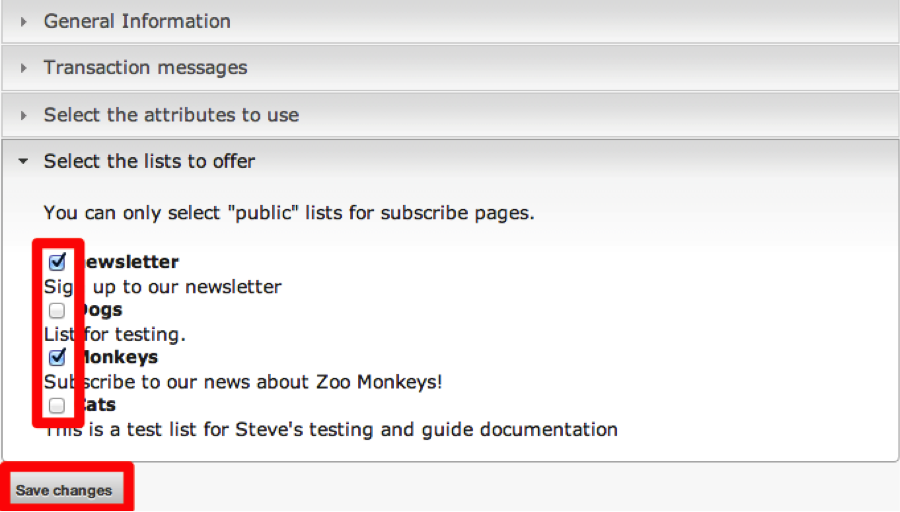
- The ‘Select the lists to offer’ permits you to choose which lists to feature on subscribe pages. Note that the administrator can only select “public” lists for Subscriber pages.
- Select Save changes to save all edits made to the subscribe page.
- You will then be taken to the default subscribe page. From there, you are able to edit, delete, or view the subscribe pages. If there are more than one subscribe pages, you have the ability to delegate which subscribe page is the default page.
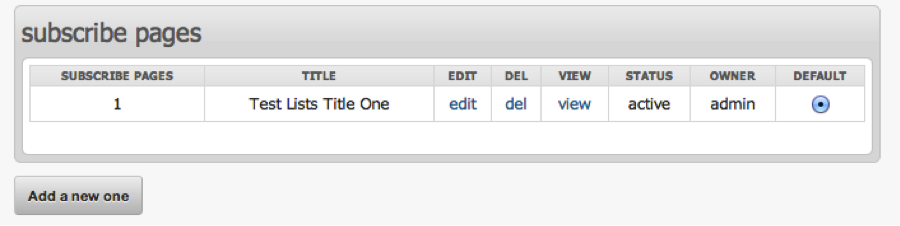
- After a Subscribe page has been created, the overview has a variety of noteworthy fields.
- Subscribe page - displays the ID of the subscribe page. Each subscribe page has a unique ID which is used within the code.
- Title – This is the title of the page, and it will appear on the top of the page, as well as in the system homepage in which all the subscribe pages are listed, along with a link for subscribers to unsubscribe from mailing lists.
- Status – A subscribe page is either active or not active. If it is active, it appears in the list of Subscriber page in the system homepage, and subscribers can access it.
- Owner - Each subscribe page is owned by an admin. Only that admin can edit the subscribe page.
- Default - Only one of the subscribe pages listed here can be chosen as the default subscribe page.
- Delete – Deletes the subscribe page
- View – The view capability shows the subscriber page as it would appear to a subscriber. (Public front-end)
- To add an additional subscribe page, select Add a new one.
- Note: After selecting a list as 'Public' on the “subscriber list” page, you must also manually add the lists to the “Subscribe page.” This is a two-part process, and it requires that you navigate to the “Subscribe Page”, edit a “Subscribe Page” of your choosing, and navigate to the Select Lists to Offer section. In this section, you will see all publicly available lists. Select the appropriate lists that you would like to display on a particular “Subscribe page,” and select Save Changes.


Add Some Subscribers
Via the “Add Some Subscribers” page, you can manually or bulk upload subscribers on the back end in a variety of ways. You can then choose to add the subscribers to any or all of the lists. For more detailed information on the three ways to import subscribers, view the corresponding documentation. 
Directions/Steps
- Continue to the final incomplete configuration setting, “Add some subscribers,” by selecting Go there next to the “Add some subscribers” field. The administrator will be taken to the “Import Emails” page offering them 3 import choices.
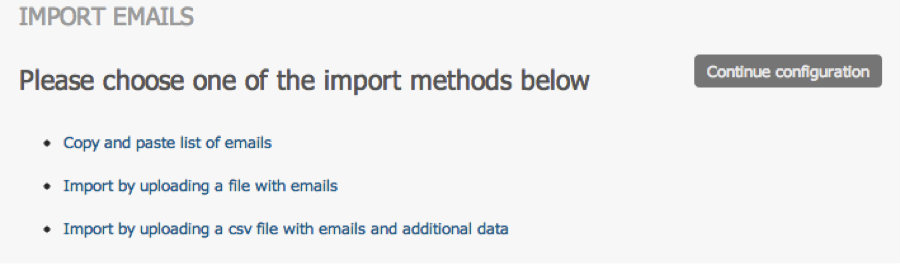
- The administrator has three email address import options to choose from:
- Copy and paste a list of emails
- Import by uploading a file with emails
- Import by uploading a CSV file with emails and additional data
- To use the copy and paste list of emails, select on the Copy and paste list of emails link
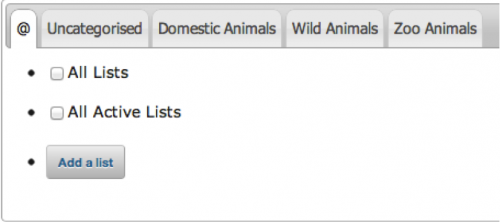
- The default lists to choose from are:
- All Lists
- Active Lists
- Add a List
- Uncategorized
- Categorized: Domestic Animals, Wild Animals, Zoo Animals
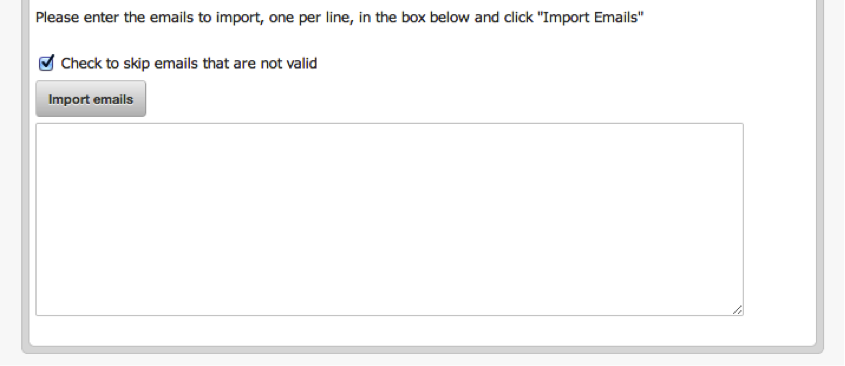
- To add emails manually, enter emails to import, one per line, in the box below, and click Import Emails. Make certain to place a checkbox in one of the corresponding lists mentioned above so the system knows where to add the new emails.
- By default, the option “Skip emails that are not valid” is checked. To remove this option, uncheck the box
- After the emails are imported, the system reports how many new email addresses were added, and how many of these were valid. If set up properly in the configuration process, you will also be emailed with the results of the import.
- At least three emails need to be added before the “Add some subscribers” step is completed.
- When Configuration is complete, all steps will have the
 Icon next to it. From there, a campaign can be started.


